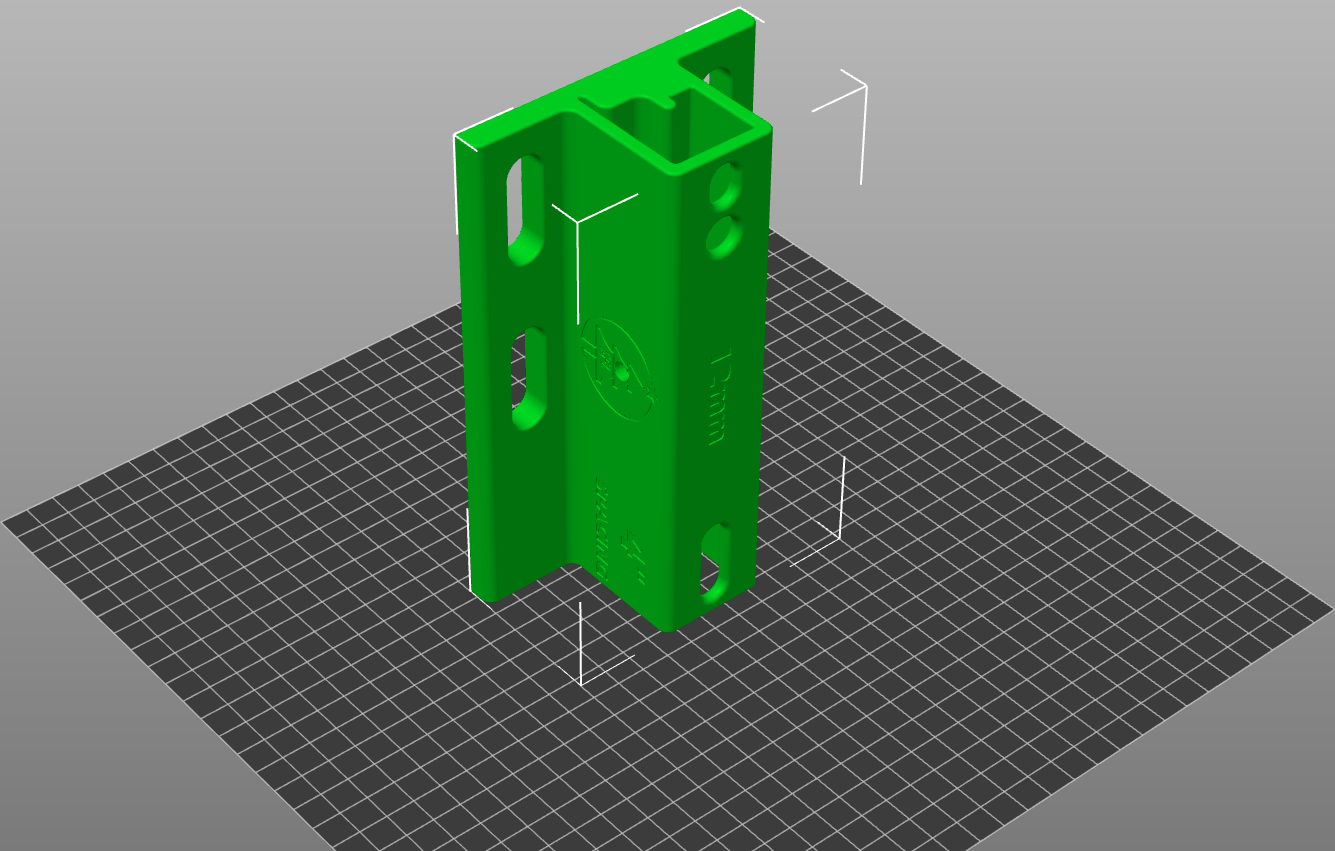
This item is only for the STL file for a custom J-Channel jig. If you are looking for the fully printed version that we ship to you, that can be found here. When printing this file, please ensure it is oriented with the inlet of the jig laying on the build plate of your printer in your slicing software. No supports should be needed when printing in this orientation. This jig can be printed in PETG or PLA.
After completing the purchase of this STL file, we will get to work on creating a custom STL file for you. Please allow us a few days to process your request. You will receive an email with the downloadable file after they are made.
Please note: The purchase of this item is only for one STL file. If incorrect dimensions are provided, or a different center to center spacing is requested, this item will need to be purchased again.
Description:
The SFL J-Channel Drilling Jig is a follow up to our popular SFL PVC Drilling Jig. This new J-Channel jig is meant to make the drilling process faster, easier and more accurate than any other designs. Unlike typical J-Channel drilling jigs, there is no need to insert or remove an alignment pin to set the hole center to center distance. The built in alignment pin simply snaps into place as the J-Channel is advanced through the jig ensuring proper spacing.
The first drilled hole in the J-Channel is correctly set with the strategically placed 1/4" hole in the sides of the SFL Drilling Jig, right smack in the middle of our awesome logo. A 1/4" drill chuck key can be inserted into this hole and then the J-Channel can be inserted into the jig, pressing up against this newly created end-stop. After that hole has been drilled, the drill chuck key can be removed and set off to the side.
The J-Channel can now be advanced to the complete all of the remaining holes. Each time the J-Channel is advanced in the jig, a small snap should be heard once the J-Channel is advanced onto the alignment pin. This pin is intended to keep the J-Channel secure as the new hole is being drilled.
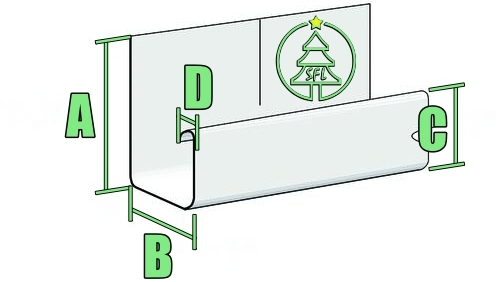
Required Dimensions:
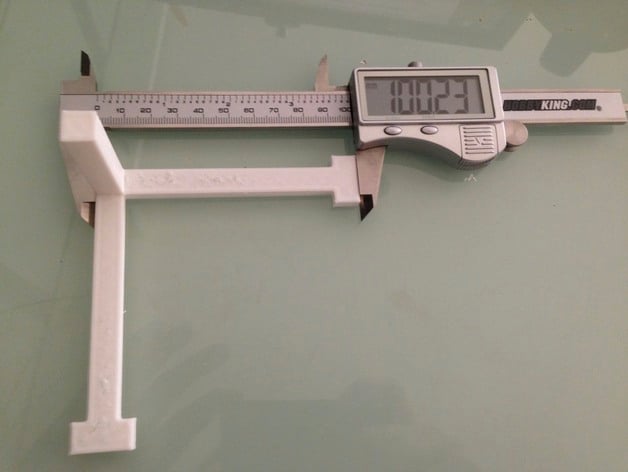
Before placing your order, please gather the following dimensions of your J-Channel so we can ensure each jig matches the dimensions of your specific J-Channel. We will build your jig to those specs, so be sure you measure twice!
Recommendations:
Alignment of the jig to the drill press is critical. Be sure the jig is perpendicular to the drill bit and once properly aligned, securely fasten the jig to the drill press table. Also be sure that the drill press table is locked tight as it could move during the pipe advancing process and cause the jig to be misaligned or even damaged by the drill bit.
During the drilling process, support both ends of the J-Channel at the same level as the J-Channel is at in the drilling jig
Try Before You Buy:
Since each J-Channel Jig is a custom design, this option is not available at this time. Thanks for your understanding.
Terms & Conditions:
Please note that by downloading any STL files from our website, you agree to our Terms & Conditions of use of any downloaded files from our website.
Recommended Printer Settings:
These are the minimum print settings that we recommend you use
PETG or ABS
At least 25% infill (grid or honeycomb for strength)
We used a 0.4mm nozzle with a 0.2mm layer height
At least 1mm wall thickness
4 walls
6 Top and Bottom layers
This can be printed without supports
Ensure that your printer is calibrated correctly, here is a Thingiverse file that we recommend to help calibrate your printer


