
Picking Pixels Without a Headache
Posted by SFL Designs on Oct 24th 2026
Last Saturday we drew the whole show on paper. This morning we shop for the lights themselves, and we do it without the headache.
Because the headache is real. Open any pixel page and you get a wall of choices that all look alike: shapes, voltages, spacings, and two words (resistor and regulated) that nobody explains. Here is the plain version, in the order the choices actually matter.
First choice: the shape
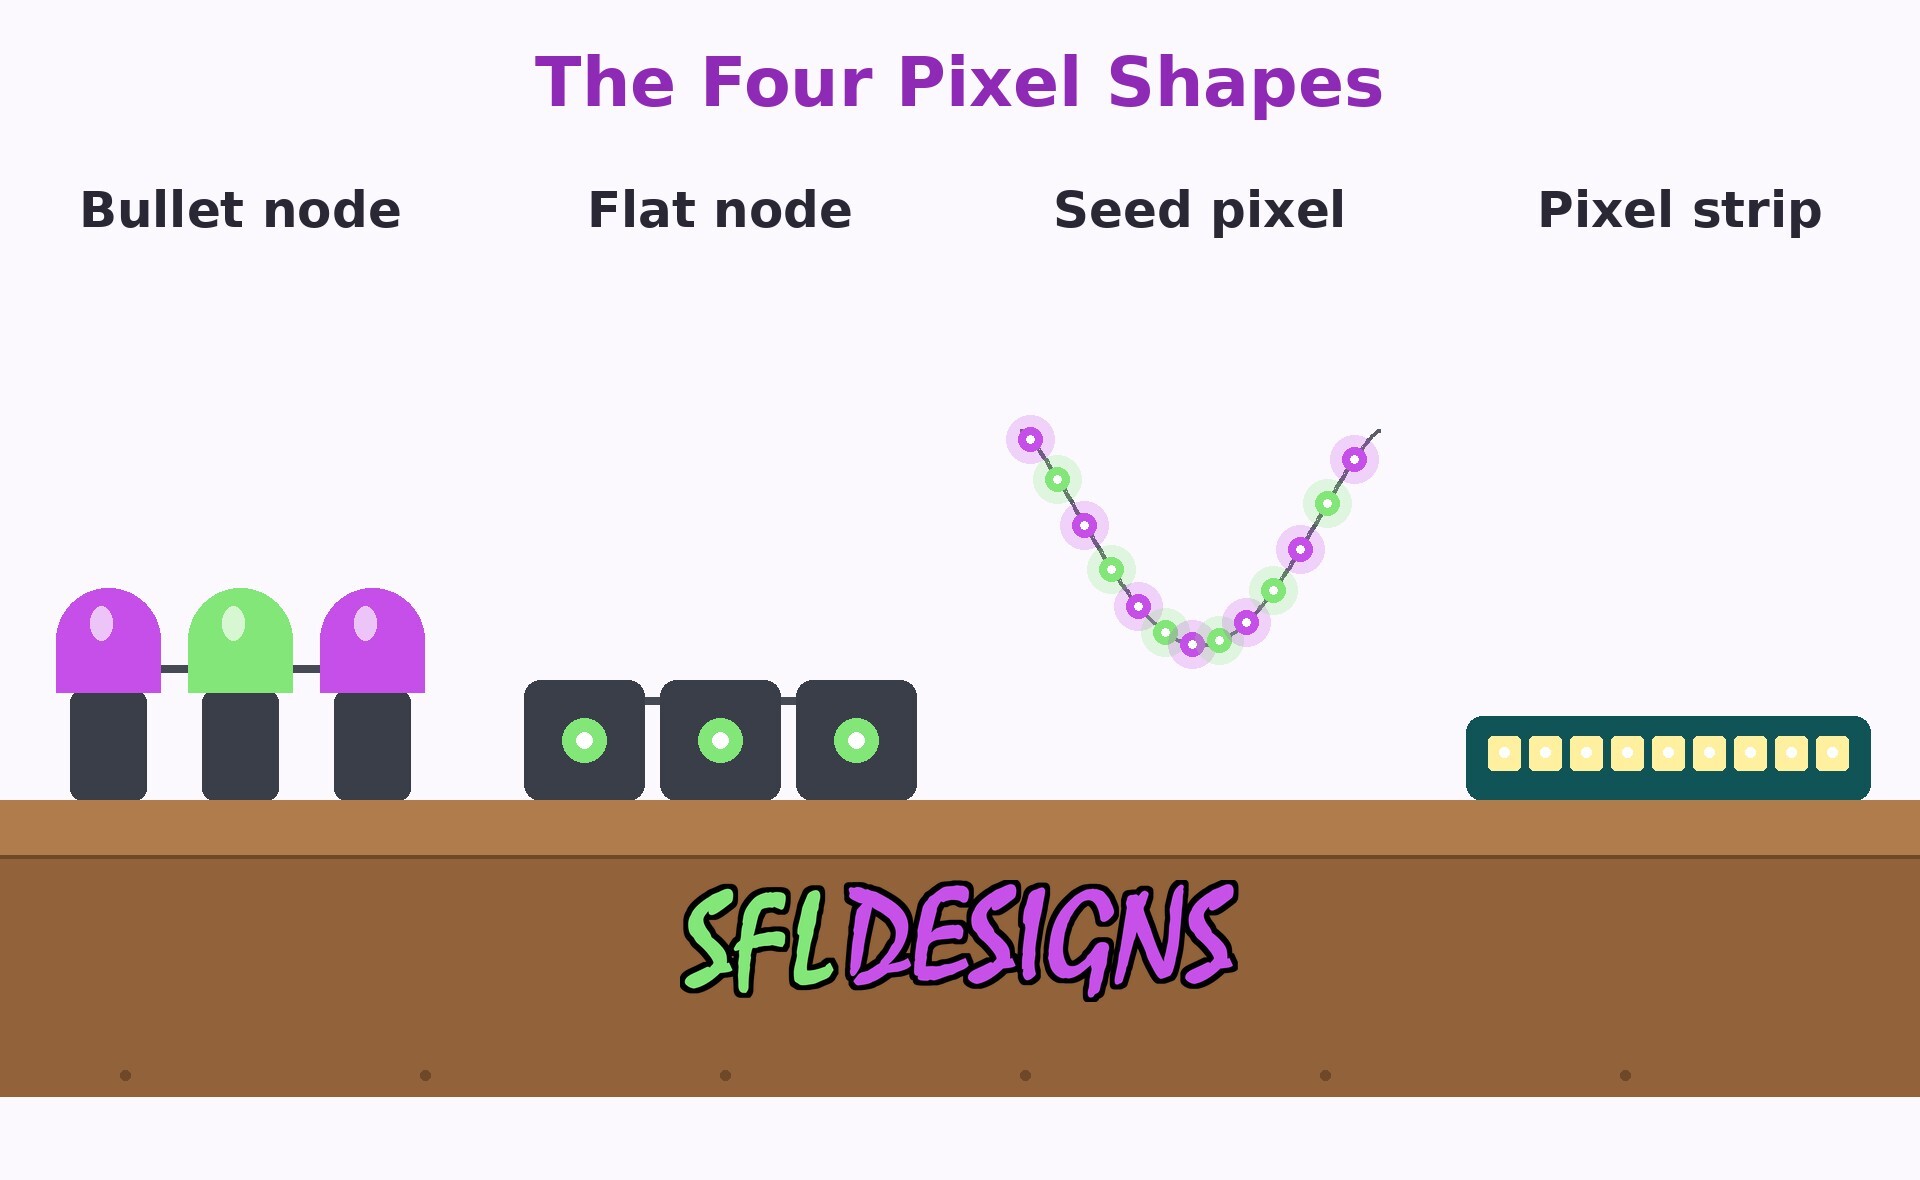
A pixel is one light that the controller can talk to by itself. Pixels come in four shapes you will meet over and over.
- Bullet nodes are the workhorse. Each light sits in a small round-nosed case, about the size of your thumb tip, on a wire with its neighbors. Bullets push into round holes drilled or molded into props, which is why most coro props, mega trees, and matrices are built around them. If you do not know what to buy, this is usually the answer.
- Flat nodes (sometimes called square nodes) are the same idea in a flat, square case. They sit flatter against a surface and suit strips, tracks, and tight spots where a bullet would stick out too far.
- Seed pixels are tiny lights on very thin wire. They weigh almost nothing, hide well, and can run in long strings. They are also more delicate to handle, and the thin wire asks you to plan power a little more carefully on long runs (last Saturday's power balancing talk came from the seed pixel world).
- Pixel strip is a row of lights on a flexible band. Strip loves straight lines: rooflines, outlines, and the inside of a clear tube on an arch, where it glows as one smooth bar instead of a row of dots.
None of these is the best pixel. Each one is the right pixel for a shape of job.
Second choice: the spacing
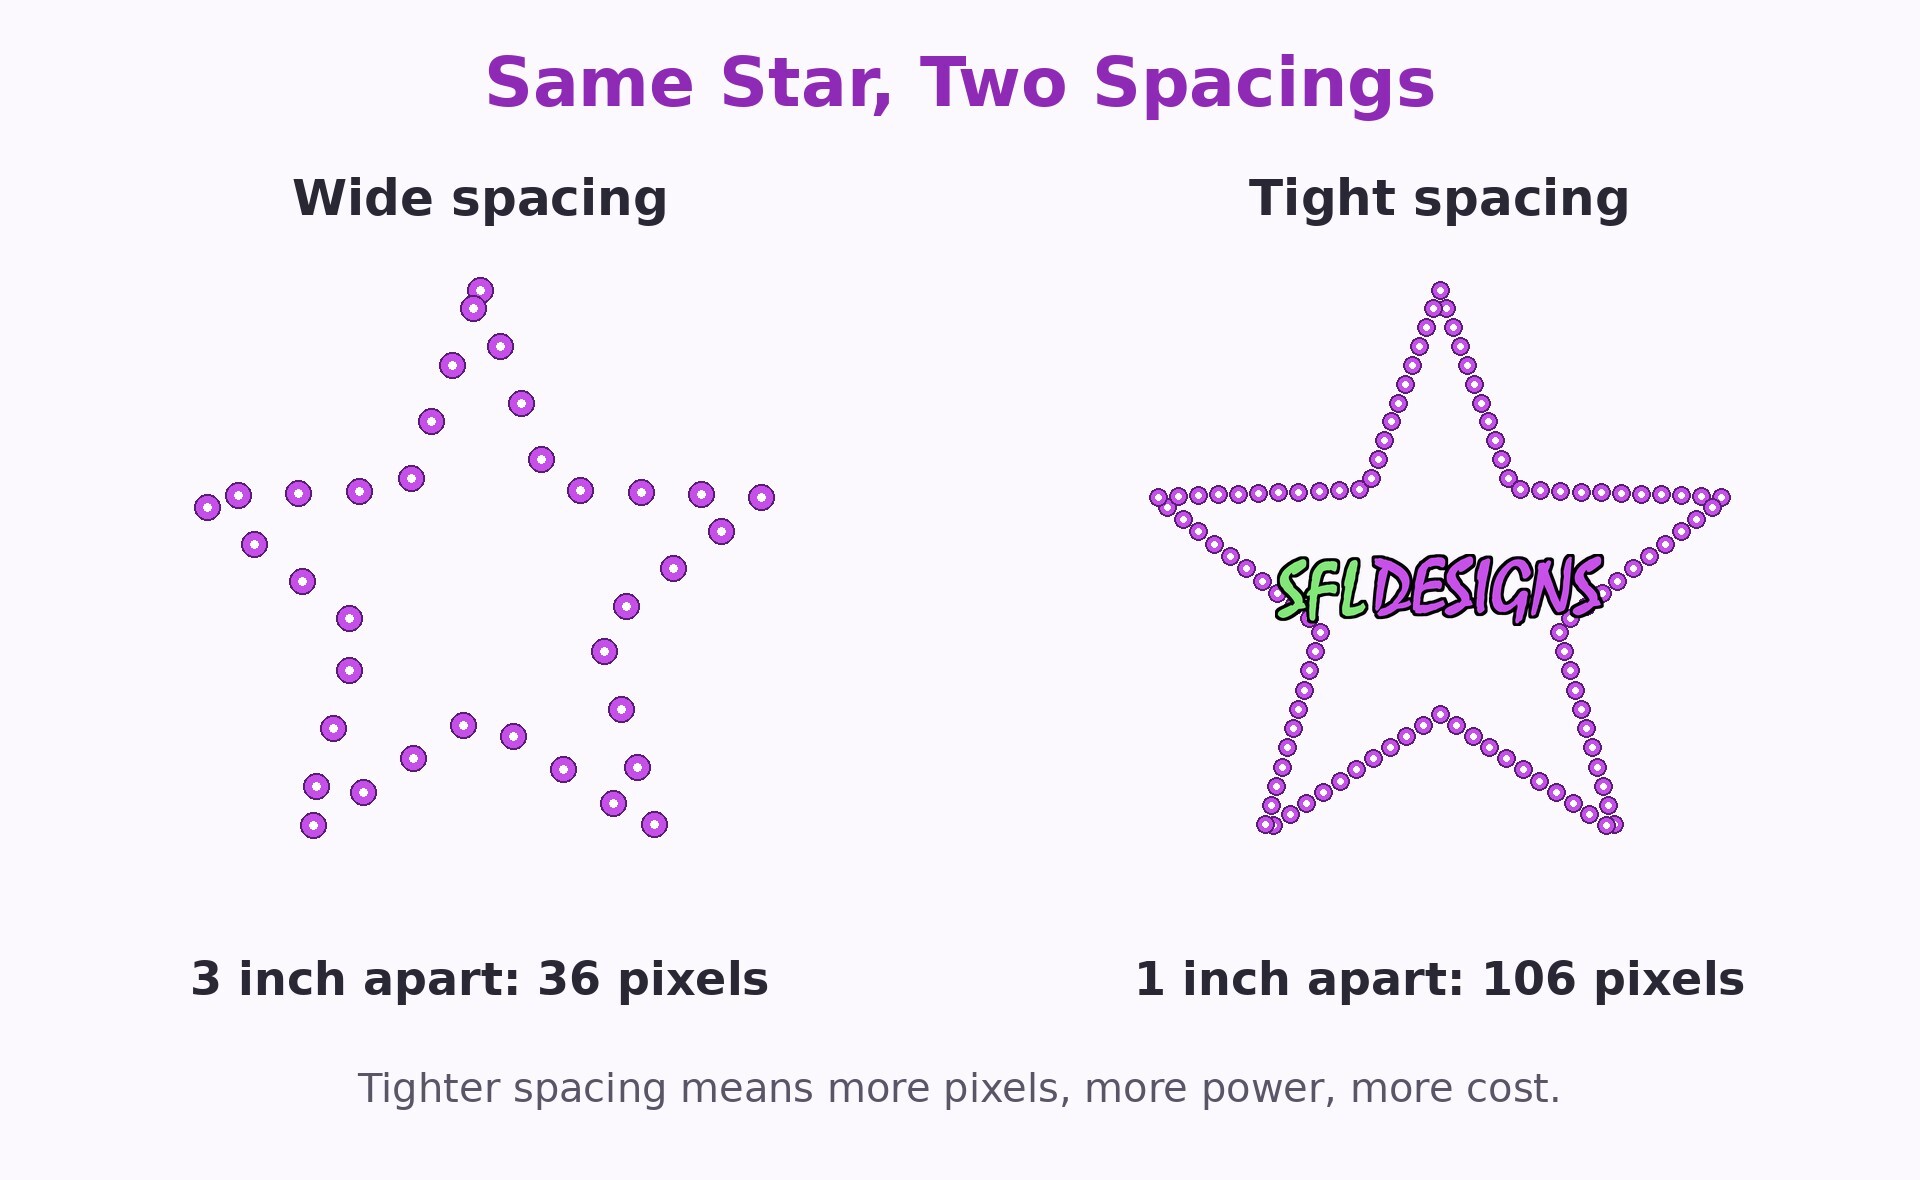
Spacing is the distance from one light to the next on the string, usually listed in inches. Two inches and three inches are common on props, wider spacings show up on rooflines and trees, and tight spacings show up where a prop wants detail.
Spacing is a trade, and it trades three things at once. Tighter spacing gives a smoother, richer look, and it costs more pixels, more power, and more controller ports to feed them. Wider spacing stretches your budget across more yard, and the show reads just fine from the street, which is where your audience stands.
One rule saves real money here: on a bought prop, the holes decide the spacing for you. Count the holes, match the spacing to the prop, and write that number down. Guessing a spacing and forcing the string to fit is how strings end up one light short at the far end. Ask me how I know.
Third choice: resistor or regulated
Inside the pixel, something has to keep the light fed at the right level. There are two ways to build that, and the word on the listing tells you which one you are getting.
A resistor pixel uses a simple resistor (a cheap part that holds current back) to do the job. Resistor pixels cost less. Their weakness shows up as voltage fades down a long run: the far pixels get dimmer sooner and drift off color sooner.
A regulated pixel carries a small circuit that actively holds the current steady. Regulated pixels cost more, and they hold their brightness and color much better as the voltage sags along the run. On long runs and big props, that steadiness is worth real money. On short runs close to the controller, resistor pixels do honest work and nobody in the street can tell.
Short version: buy regulated for the long and the large, save the resistor savings for the short and the close.
The voltage question, settled friendly
You will meet two camps: 5V pixels and 12V pixels. Around here the house standard is 12V, for one plain reason: higher voltage travels farther down a wire before it fades, so 12V is more forgiving on the long runs a real yard is full of. Our 5V friends run gorgeous shows, and we tease them with love. There is even a sticker in the shop about it.
What is not friendly, or smart, is mixing the two. A 5V pixel fed 12V dies fast and unhappy. Pick one voltage for your show, label your supplies, and never let the two families share a bin.
Shop note: Pick one connector family and one voltage, and write both on the lid of the tote your pixels live in. Connectors that look almost alike are not alike: strings and pigtails (the short cable tails that adapt a string to an extension) from different connector families will not plug together in the yard, in the dark, in November. A tote label written in October is a whole evening saved later.
Before you check out
Count the prop, not the dream. Every prop on your map gets three numbers: how many pixels, what spacing, and which shape. Add a few spare strings of the same kind for the failures life sends (a dead pixel mid-string is a when, not an if). Then this afternoon we do the part that makes those numbers real: we open xLights, tell it which controller is running the show, and let it do the channel math for the strings you just picked.
— Jason, SFL Designs
From our workbench to your display — print it, mount it, light it up.