
Perfect Fits Need Deliberate Gaps
Posted by SFL Designs on Nov 19th 2026

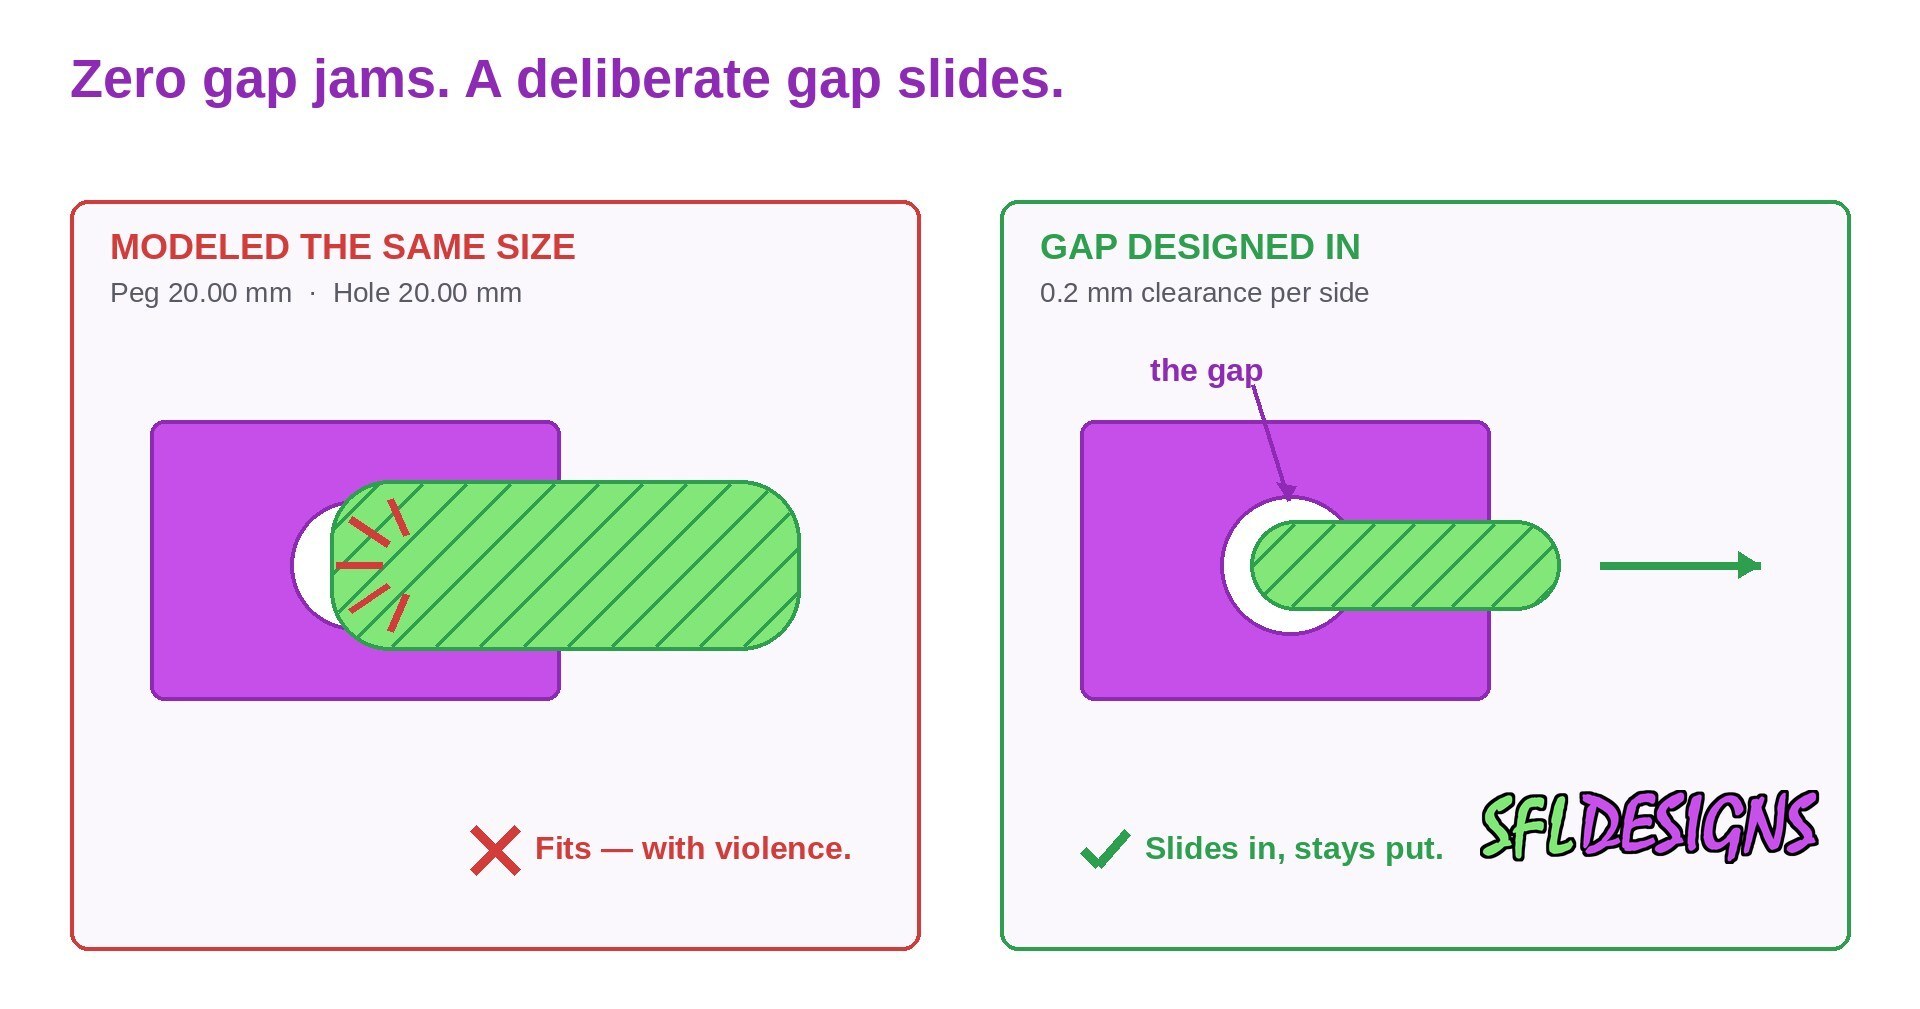
Here is a rite of passage in 3D printing: you model two parts that fit together, you make the peg exactly the size of the hole (20.00 mm meeting 20.00 mm, a perfect fit), and the printed parts refuse to go together without violence. The model was not wrong about geometry. It was wrong about reality. Printed parts need gaps, and the gaps need to be designed, not discovered.
Two words that get used like one
Tolerance is how much a dimension is allowed to vary, the wobble in the process. Your printer, your material, and your settings together decide how far a printed dimension can land from the number you typed.
Clearance is the gap you deliberately leave between two mating parts so they fit despite the tolerance. Tolerance is what the process does to you. Clearance is what you do about it. You cannot control the first one directly, and you completely control the second. Confusing them is how “perfect fits” happen.
Where the error comes from
A printed hole is almost never the size on the screen, and the reasons are boring, physical, and consistent. The extruded line has width, and the slicer places that width along the path, small curves and corners tend to pull inward. Plastic shrinks a little as it cools, some materials more than others. Layer lines add their own texture to every surface. Motors, belts, and calibration contribute their share. None of this is a defect you can tune to zero. It is a budget of small errors, and your clearance is how you pay it.
Holes tend to print small. Pegs and outside dimensions tend to print close or a touch large. Put those two tendencies together in a zero-gap design and the math was never going to save you.
Starting clearances worth testing
These are starting points for common desktop FDM printing, numbers to test on your machine with your material, not commandments:
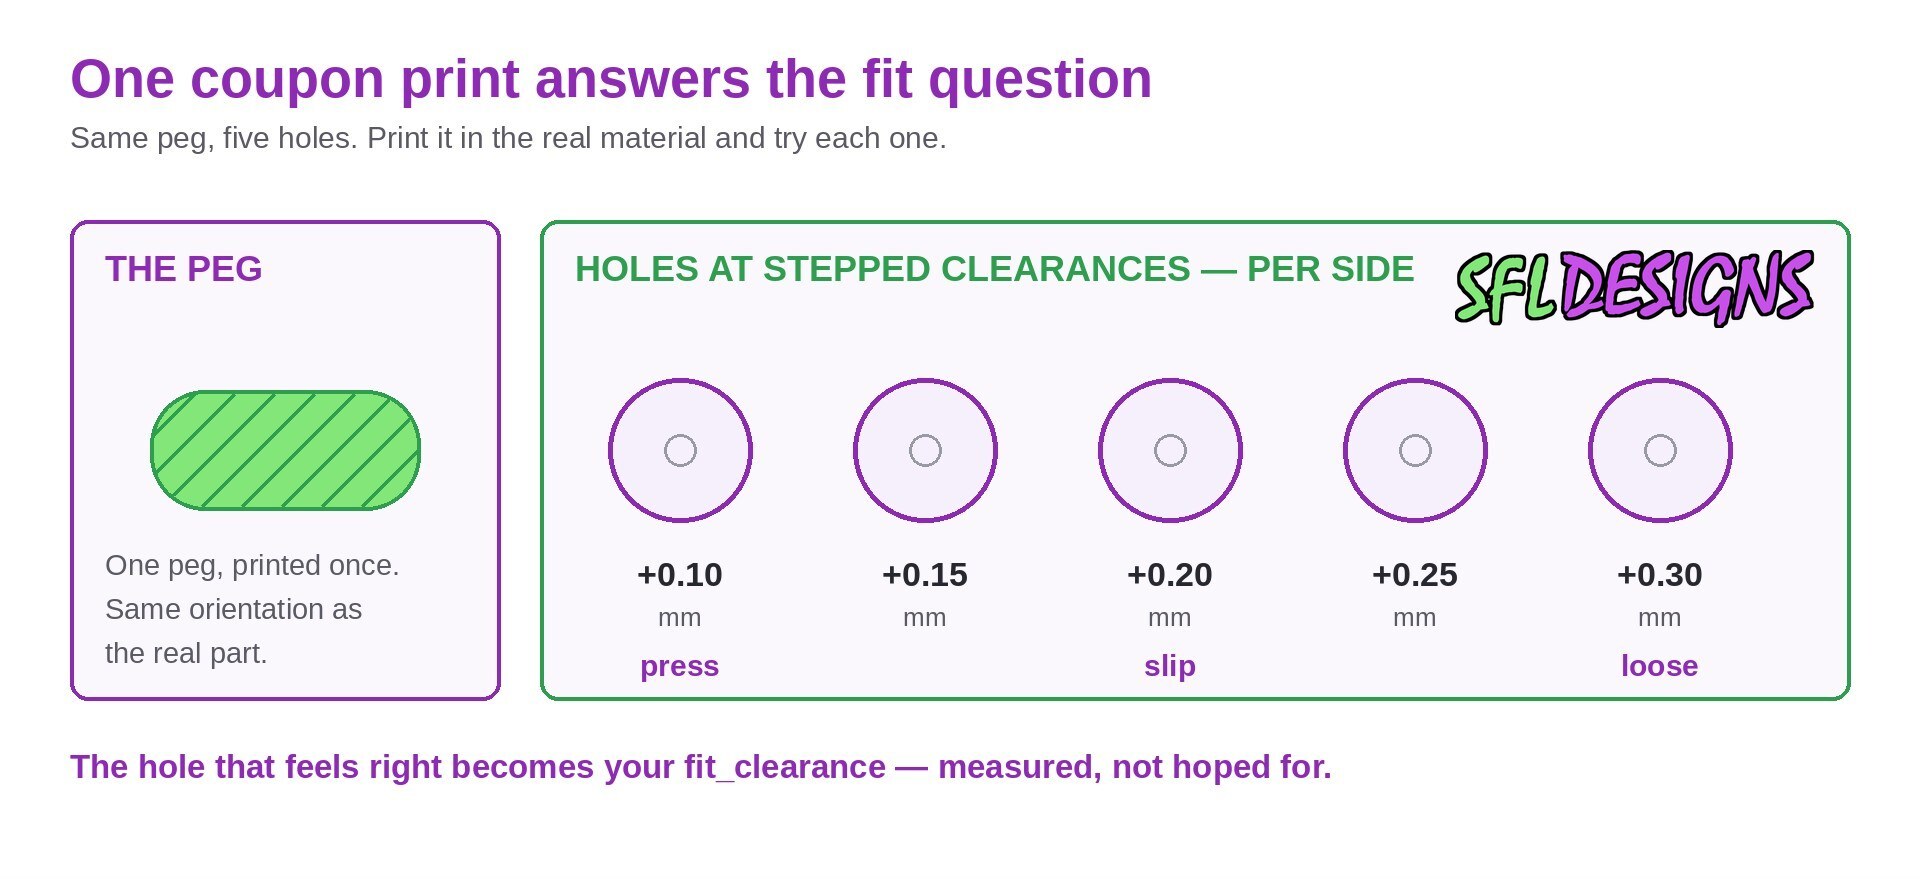
- ~0.1 mm per side: a snug press fit; parts may need real force and may not come apart politely.
- ~0.2 mm per side: a firm slip fit; parts slide together and stay put. A good default neighborhood for lids and covers.
- ~0.3 mm per side and up: a loose, easy fit; parts move freely, hinges swing, nothing binds.
Your numbers will differ, material, nozzle, and machine all vote. Which is exactly why the next section exists.
Test coupons: cheat small before you print big
A test coupon is a throwaway miniature of just the fit you care about: a small block with a row of holes at stepped clearances, or a peg and a short series of slots. Print it in the same material, same orientation as the real part, and try the fit with your hands. Ten minutes of coupon tells you more than an evening of forum opinions, because it is your printer answering.
Stepped coupons are the trick: one print, several clearances, and the part itself reports which one feels right. Then you go back to the design with a number you measured instead of a number you hoped for.
Shop note: Never test a fit at full size first. Print the smallest possible version of the joint, learn the number, then spend plastic on the real part exactly once.
Design the gap in on purpose
In Fusion 360, build the clearance into the model instead of compensating later. Model the mating part, then use Offset Face to push the contact surfaces back by your tested clearance, or drive the gap with a user parameter, something like fit_clearance, so the whole design updates when your coupon teaches you a better number. Name it once and reuse it everywhere that joint appears. When the same design prints in a different material and needs a different gap, you are changing one parameter instead of remodeling.
Slip fits and press fits are both legitimate, they are just different clearances chosen on purpose. The sin is not the tight fit. The sin is the accidental one.
The practical rule
Never let two mating surfaces share the exact same dimension. Decide how the parts should behave (slide, snap, press, or swing), pick a starting clearance for that behavior, print a coupon, and adjust. Fits stop being a gamble the day the gap becomes a designed feature instead of a rounding error. Perfect, it turns out, includes a little empty space.
— Jason, SFL Designs
From our workbench to your display — print it, mount it, light it up.