
The Origin Is Not Decoration
Posted by SFL Designs on Nov 5th 2026
Every Fusion 360 design opens with something most beginners treat as set dressing: the origin, the fixed point where the three default planes (the flat reference surfaces named XY, XZ, and YZ) cross. It just sits there at the center of the canvas looking official. It is not decoration. It is the only address in your entire model that can never move, and building from it is the difference between a design and a rumor.
What the origin actually gives you
The origin is a permanent reference that exists before you draw anything and survives every edit you will ever make. The three origin planes are just as permanent. Anything you attach to them (a sketch point, a symmetric layout, a body’s starting face) is located by something that cannot drift, get deleted by accident, or change its mind when an earlier feature gets edited.
Compare that with the way models often get built: sketch one floats in space, body two is located off body one’s face, feature three is located off feature two. It works, right up until you edit body one and watch the whole family tree slide around like furniture on ice.
Anchoring makes edits boring (and boring is good)
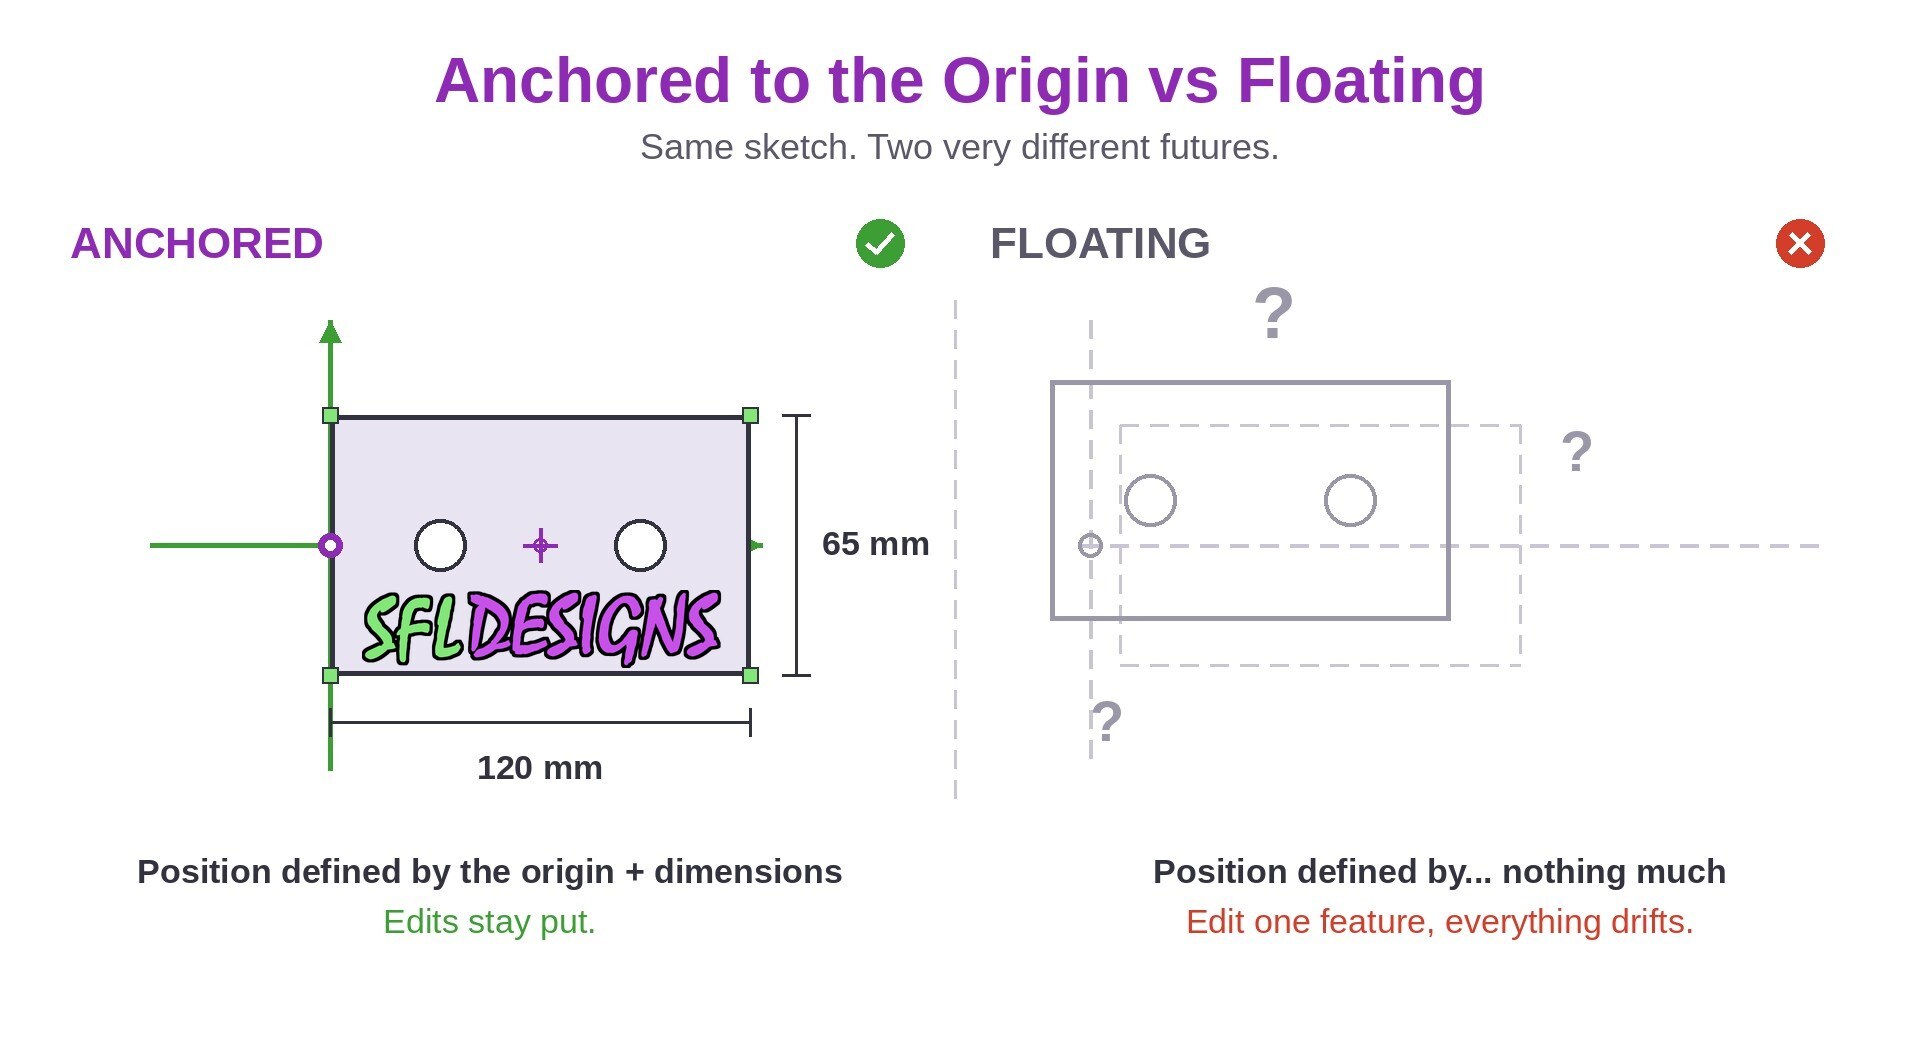
When a sketch is constrained to the origin, its position is defined by fixed references and real dimensions. Change a parameter, resize a feature, roll the timeline back and edit something early, the anchored geometry stays where the design says it should, because it was never depending on a neighbor’s good behavior.
When nothing is anchored, small changes ripple. A hole that was “close enough” to an edge moves when the edge moves. A part that looked centered turns out to be centered relative to another part that was not. Anchoring to the origin is how a model survives the edits you already know are coming: the size change, the different hardware, the version two.
Symmetry is free at the origin
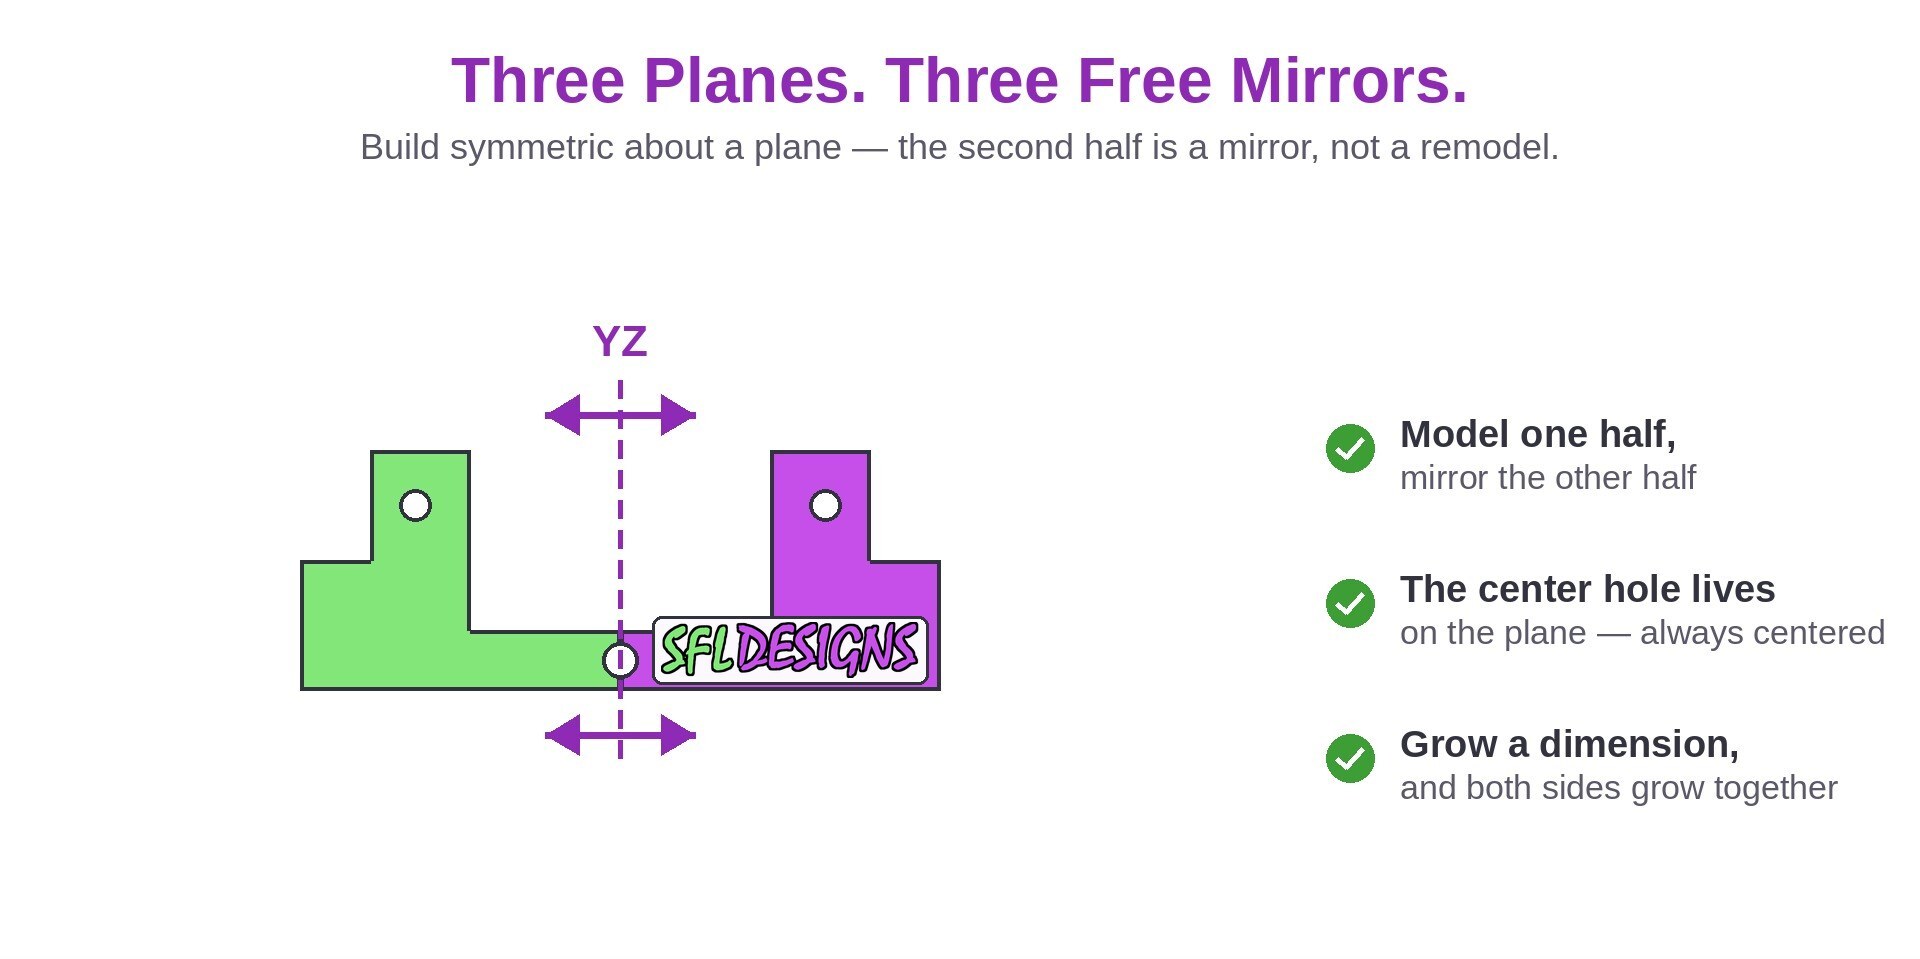
Here is the part people kick themselves for learning late. If you build a part symmetric about an origin plane, you get professional tricks for zero extra work:
- Mirror features and bodies across the plane instead of modeling the second half: model one side, mirror it, done.
- A guaranteed center. Need a hole dead-center on the part? It lives on the plane, not at “half of whatever the width currently is.”
- Balanced changes. Grow a dimension and the part grows both ways, staying centered on your mounting points instead of wandering off to one side.
Design a bracket centered on the YZ plane, and its centerline is a fact of the design. Design it floating off to the left somewhere, and “center” is a number you get to keep re-measuring forever.
What goes wrong when everything floats
- Edits cascade. Move one early feature and three downstream features relocate like they were subletting from it.
- Mirror tools fight you. Mirroring across a random face or a guessed plane gives you a copy that is almost (but not quite) where it belongs.
- Assemblies stop lining up. Parts modeled around their own private “centers” meet at the joints with mystery offsets.
- Future you gets confused. Six months later, nobody (including the person who drew it) can tell what the part’s position is referenced to.
None of this breaks on day one. It breaks on revision four, during a deadline, which is exactly when you can least afford archaeology.
Shop note: The origin is the only employee who never calls in sick. Give it the important jobs: centers, symmetry, and anything that must not move.
A starting habit worth stealing
Before the first sketch of any new design, decide two things:
- Which origin plane is the part’s “floor” or mounting face? Start the base sketch there.
- Which plane is the part symmetric about, if any? Center the first profile on it.
Then, in that first sketch, constrain the key geometry to the origin directly: snap the center point, the main rectangle, or the driving profile to it, and dimension outward from there. Every feature after that inherits a stable home. It takes ten extra seconds at the start and saves the tenth revision from becoming a rebuild.
The origin is not there to make the canvas look technical. It is the foundation pin of the whole design, the one reference that will still mean the same thing after every edit, resize, and bright idea. Build on it, and your models stop drifting. They just get revised, which is what designs are supposed to do.
— Jason, SFL Designs
From our workbench to your display — print it, mount it, light it up.